
Repurposing Everyday Objects
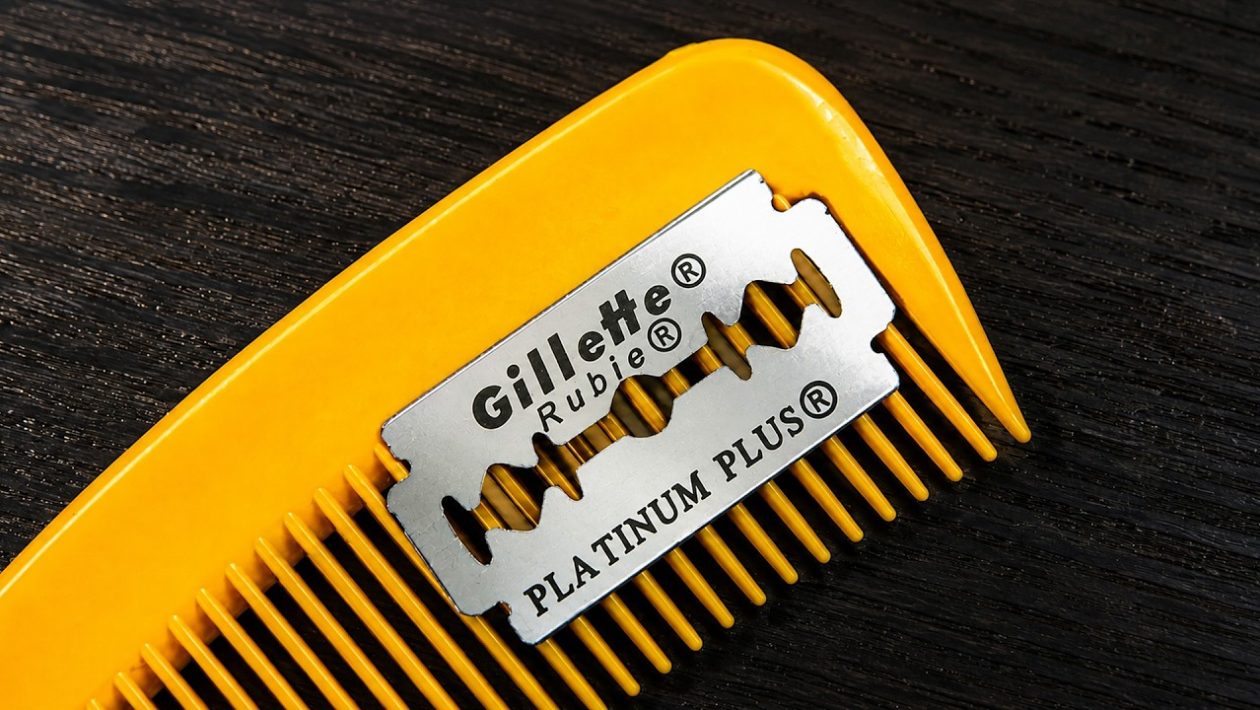
Repurposing ordinary household items is a staple of workshop ingenuity. One highly effective trick involves combining two cheap bathroom staples: a plastic hair comb and a double-edge safety razor blade.
The result is a makeshift safety cutter that rivals specialized hardware tools. It provides a precise, guarded edge for tasks where a standard utility knife is simply too large.
The Mechanics of the Razor Comb
Commercial razor combs have existed for decades, primarily used by barbers to thin out thick hair. The DIY workshop version adapts this exact principle for industrial use.
By mounting a blade against the comb’s teeth, the plastic tines transform into a built-in safety guard. This guard prevents the blade from cutting too deeply into a surface.
More importantly, the rigid plastic teeth protect the user’s fingers from accidental slips while allowing narrow materials to pass through to the blade.
Unlocking New Workshop Applications
A bare razor blade is dangerous to hold and easily slips during precision work. Conversely, a heavy-duty box cutter lacks the finesse required for delicate crafting tasks.
The modified comb cutter bridges this gap perfectly. It excels at safely slicing through nylon twine, paracord, or heavy-duty packaging tape in a single motion.
Electricians and hobbyists can also use the guarded edge to carefully strip insulation from small-gauge electrical wires. The comb’s teeth guide the wire, preventing the blade from severing the delicate copper strands inside.
Gathering the Right Materials
Building this tool requires minimal investment. Standard double-edge safety razor blades cost pennies apiece and are widely available at pharmacies or hardware stores.
A basic plastic pocket comb provides the structural chassis. A comb with closely spaced, rigid teeth yields the best results.
You will also need a reliable securing mechanism. Depending on your preferred assembly method, cyanoacrylate (super glue), miniature zip ties, or heavy-duty tape will do the job.
Construction Methods
The simplest assembly method involves placing the blade flat against the base of the comb’s teeth. You can secure it firmly by threading small zip ties through the gaps in the tines and pulling them tight over the blade.
A more advanced method requires modifying the comb’s spine. By carefully heating a scrap piece of metal wire, you can melt a thin slit directly down the center of the comb’s plastic base.
The razor blade is then slotted tightly into this newly formed groove. This friction-fit method ensures the blade will not wobble during heavy use.
Alternatively, some makers prefer to sandwich the razor blade between two identical combs. They bind the handles together, creating a sturdy, double-sided safety guard.
Achieving the Proper Blade Depth
Regardless of the construction method, positioning is critical. The blade’s sharp edge must sit just below the tips of the plastic tines.
If the blade is exposed beyond the teeth, the tool loses its safety benefits and functions just like a loose, dangerous razor. If the blade sits too deep, the materials you are trying to cut will not reach the cutting edge.
Taking the time to align the blade perfectly dictates exactly how well the final tool will perform.
Mandatory Safety Precautions
Handling loose razor blades requires extreme caution. When assembling this tool, wearing heavy leather work gloves is non-negotiable.
Always wear protective eyewear to guard against snapping blades or flying plastic debris during assembly. Modern razor blades are incredibly thin and can shatter if forced.
Once assembled, the tool is much safer to handle, but it remains a highly effective cutting instrument. Never store it loosely in a pocket or an apron. Keep it in a dedicated toolbox compartment, entirely out of reach of children or pets.
Changing Worn Blades
Standard safety razor blades dull quickly when repeatedly cutting abrasive materials like cardboard or heavy cordage. Your construction method will dictate how easily you can swap in a fresh edge.
If you used zip ties or a pressure-fit slot, replacing the blade takes seconds. If you permanently glued the blade into place, the entire tool is essentially disposable.
Given the incredibly low cost of a plastic pocket comb, building a completely new unit is highly economical.
The Appeal of Functional Upcycling
Creating a custom tool from scrap materials is about more than saving a few dollars. It forces a maker to look at everyday objects through a lens of raw utility.
A simple dollar-store grooming item easily transforms into a precision cutting instrument. It proves that effective engineering does not always require expensive hardware.




