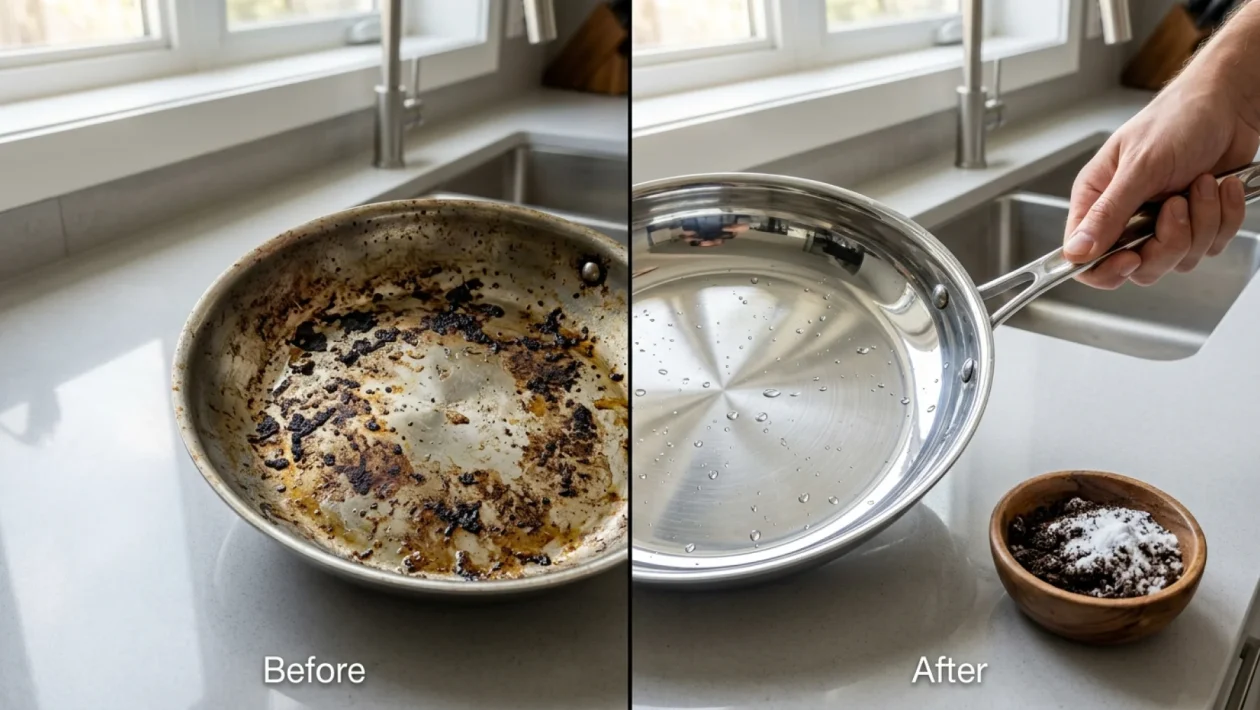
Hey there, it’s great to connect with you today! I’m always looking for ways to work smarter, not harder, around the house, and I can’t wait to show you why your morning caffeine routine holds the key to a cleaner home. Used coffee grounds mixed with baking soda create a high-performance, eco-friendly scouring paste that eliminates odours and cuts through grease on contact. This isn’t just a “green” alternative; it’s a professional-grade hack for your toughest kitchen messes.
The Science of Scouring: Why This Duo Actually Works
When you combine used coffee grounds with baking soda (sodium bicarbonate), you are creating a dual-action cleaning agent. Chemically, baking soda is a mild alkali which makes it incredibly effective at neutralizing acidic odours—think of that lingering smell in the back of your fridge or inside a gym bag. Physically, the grounds provide a gentle but firm abrasive texture that mimics the action of high-end scouring powders without the harsh chemicals.
The used coffee grounds contain natural oils and a slight acidity that helps break down lipids (fats and grease) on your cookware. This mechanical exfoliation is safe for most stainless steel and cast iron surfaces. Furthermore, coffee contains nitrogen, which reacts with the air to absorb sulfur-based smells. By adding Arm & Hammer baking soda to the mix, you boost the pH-balancing properties, making it a versatile tool for everything from exfoliating skin to freshening up carpets or trash bins.
In the spring of 2026, as more Canadians lean into sustainable “zero-waste” living, this method has gained traction because it utilizes materials you already have. Whether you are using Nabob, Tim Hortons at-home blends, or Kicking Horse Coffee, those dregs are more valuable than you think. Health Canada and environmental groups have long suggested reducing synthetic fragrance use in the home, and this natural alternative fits the bill perfectly.
“The move toward circular household economies starts in the kitchen. Reusing organic waste like coffee dregs for sanitation is a logical step for the modern, eco-conscious consumer.” — Sustainable Home Magazine, 2026.
Step-by-Step Guide: Preparing Your DIY Cleaning Paste
Ready to get your hands a little dirty to get your house clean? Here is exactly how to prep and use this mixture like a pro.
- Dry your grounds: After brewing your morning pot, spread the used coffee grounds on a paper towel or tray to dry slightly. Excess moisture can make the mixture too runny.
- Measure the ratio: In a small container, combine two parts used coffee grounds with one part baking soda.
- Add a binder: For cleaning surfaces like pots and pans, add a few drops of water or Dawn dish soap to create a thick, spreadable paste.
- Apply and scrub: Rub the paste onto the greasy surface using a sponge or a cloth. The grit will lift the burnt-on food.
- Rinse thoroughly: Use warm water to rinse away the residue. For deodorizing a fridge, simply leave the dry mixture in an open bowl on a shelf for 24 hours.
| Component | Primary Cleaning Effect |
|---|---|
| Used Coffee Grounds | Abrasive scouring and nitrogen-based odour absorption. |
| Baking Soda | Neutralizes acidic smells and softens hard water stains. |
Frequently Asked Questions
Can I use this on non-stick pans?
I wouldn’t recommend it. While used coffee grounds are a “gentle” abrasive, they can still micro-scratch delicate Teflon or ceramic coatings. Stick to stainless steel, cast iron, or your kitchen sink.
Will the coffee grounds stain my surfaces?
If you leave the mixture sitting on a porous surface like light-colored marble or unsealed wood, yes, it can leave a brown tint. Always do a small “spot test” first and rinse immediately after scrubbing countertops.
Is it safe for my plumbing?
In small amounts, it’s fine, but don’t dump massive quantities of used coffee grounds down the drain at once. Always use plenty of water to flush them through, or better yet, compost the mixture after it has done its cleaning job.
🤝 Thanks for taking the time to read my latest guide! I hope this helps you keep your place looking sharp without breaking the bank. 💡
📱 If you found this tip useful, I’d be honored if you would share this on Facebook or Pinterest so your friends can save some cash too!
👇 Feel free to check out my other exciting articles on DIY home maintenance and expert gentlemanly advice. Good luck with the cleaning!