
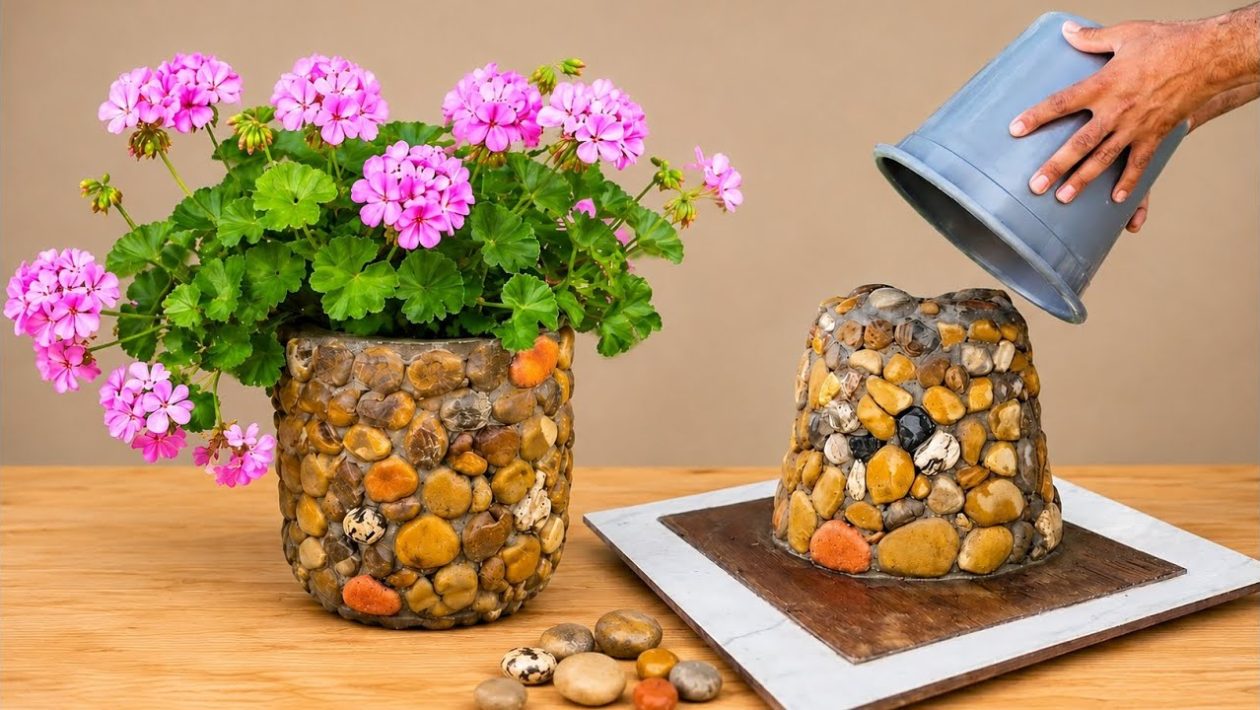
Bypass the Retail Markup on Garden Decor
High-end garden planters often come with a massive price tag at home improvement stores. You can easily bypass that retail markup by building your own.
Transforming a standard, worn-out plastic bucket into a heavy-duty river stone planter is a straightforward weekend project. It requires only a few cheap materials, basic hand tools, and a bit of patience.
This method not only keeps old plastics out of landfills but also results in a unique, natural-looking piece of outdoor decor that can survive harsh weather.
Gathering Your Materials
You can source everything you need for this project from a local hardware store or your own backyard.
The core component is an old plastic bucket. A standard 5-gallon utility bucket works perfectly for medium-sized shrubs or large floral arrangements.
You will also need a bag of smooth river stones, standard Portland cement or a pre-mixed mortar, and a trowel. To help the cement adhere to the smooth plastic, pick up some coarse sandpaper or lightweight wire mesh.
Prepping the Plastic Container
Cement does not naturally bond to smooth plastic. If you apply it directly, it will eventually flake and fall off.
Start by drilling several drainage holes into the bottom of the bucket. Without adequate drainage, your plants will suffer from root rot.
Next, rough up the entire exterior of the bucket using coarse sandpaper. For maximum durability, wrap the bucket tightly in thin wire mesh or chicken wire, securing it with zip ties. This creates a mechanical grip for the heavy cement.
Mixing and Applying the Cement
Mix your cement or mortar in a separate tub or wheelbarrow. Add water slowly until you achieve a thick, peanut-butter-like consistency.
If the mix is too thin, it will slide right off the bucket. If it is too dry, it will crumble and fail to hold the heavy river stones.
Using your trowel, apply a thick, even base coat of cement around the entire exterior of the bucket. Work from the bottom up, ensuring the wire mesh is completely embedded in the wet mix.
Setting the River Stones
Once the bucket is coated, immediately begin pressing the river stones into the wet cement. You have to work quickly before the mortar begins to set.
Press each stone firmly into the mix so that at least half of the rock is submerged. This guarantees the stone will stay locked in place once the cement dries.
Place the stones as close together as possible to minimize the amount of visible cement. You can arrange them randomly for a natural look, or sort them by color and size to create deliberate geometric patterns.
Curing and Final Protection
After placing the final stone, use a damp sponge to wipe away any excess cement that may have smeared onto the face of the rocks. This keeps the stones looking clean and polished.
Move the planter to a shaded, dry area and let it cure for at least 48 hours. Cement requires a slow drying process to achieve maximum structural strength.
Once fully cured, you can apply a coat of clear masonry sealer. This optional step protects the cement from moisture damage and gives the river stones a permanent, glossy “wet” look.
Fill the finished pot with high-quality potting soil, add your favorite outdoor plants, and set it in your garden.




