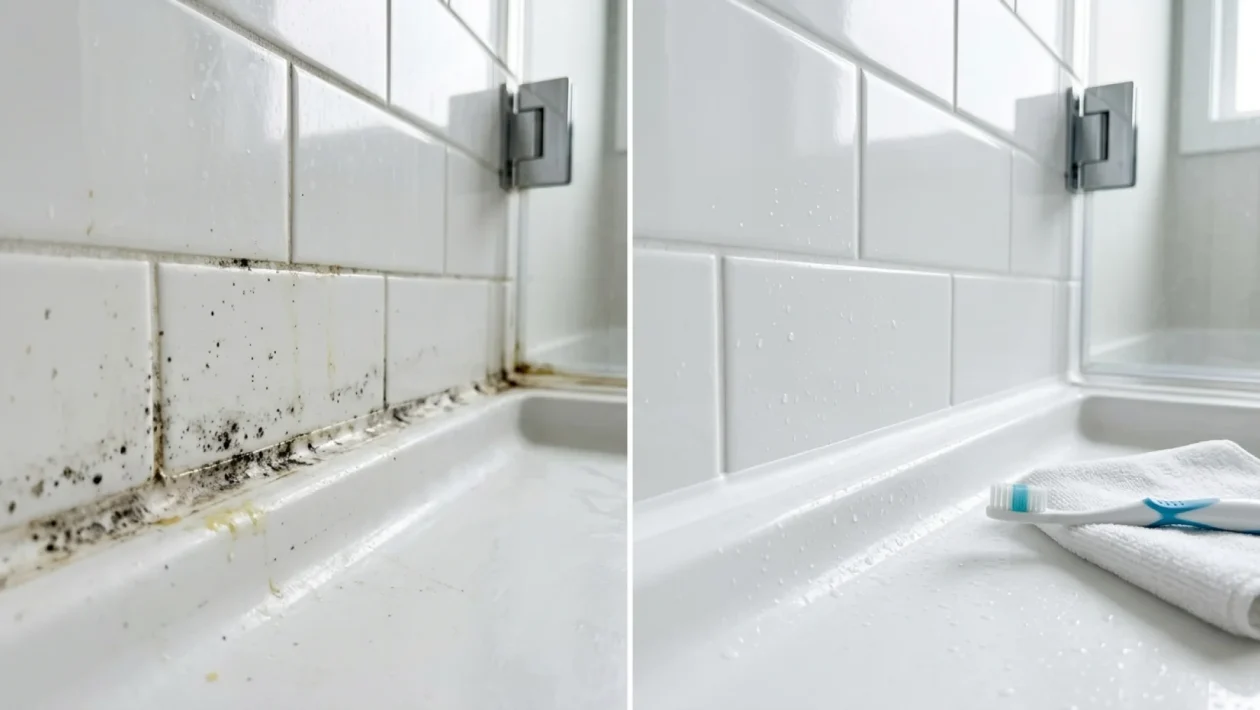
Your bathroom is harboring a disgusting secret, and you’re probably making it worse every weekend. That black, grimy line creeping along the bottom of your shower isn’t just an eyesore—it’s a massive headache. You’ve likely attacked those delicate silicone joints with stiff brushes, toxic bleach sprays, and enough elbow grease to swap a truck transmission. But here’s the brutal truth: you are actively destroying your shower’s waterproofing. Harsh scrubbing and abrasive chemicals actually create micro-scratches in the rubber, turning it into a permanent magnet for soap scum and fungal growth. Today, we are retiring the heavy artillery. I’m going to show you exactly how to restore those crucial waterproof barriers using a ridiculously easy, gentle approach that actually works.
Shower Seals Cleaned Fast
It sounds entirely counterintuitive, but when it comes to caulking, being a little lazy is actually the superior choice. Silicone is incredibly sensitive and completely unforgiving if mistreated. If you reach for heavy-duty scouring powders like Vim to blast away the dirt, you’re instantly ruining the smooth finish.
Did you know that aggressively scrubbing your silicone with abrasive pads creates microscopic trenches that increase its susceptibility to deep-rooted bacteria and mold by a massive margin? Once that protective smooth barrier is compromised, you’re locked in a never-ending war with bathroom grime.
The secret to blinding speed isn’t harder scrubbing; it’s chemical leverage. Warm water and a high-quality pH-neutral cleaner are literally all you need to melt away that yellowish layer of body oils and soap residue without lifting a sweat.
The No-Scrub Strategy
Ready to reclaim your Saturday afternoon? This foolproof method dissolves surface grime without degrading the vital rubbery seal that keeps water out of your expensive drywall. Leave the power tools in the garage and follow this simple path.
- Saturate the zone: Lightly wet the dirty caulking with warm water to soften the top layer of hardened soap scum.
- Apply a neutral cleaner: Gently work a mild, non-acidic soap into the seal using a soft-bristled baby toothbrush.
- Let it sit: Step away for 5 to 10 minutes to let the solution break down the greasy fats—let the chemistry do the heavy lifting for you.
- Rinse and buff: Rinse away the suds with clean warm water and immediately wipe the joint bone-dry with a fresh microfiber cloth.
Eliminate Mold
Soap scum is one thing, but those stubborn black polka dots dotting your shower corners? That’s mold, and it requires a highly targeted surgical strike. Let me be crystal clear: keep the vinegar away from your silicone.
While household vinegar is a fantastic, cheap descaler for your glass doors and metal fixtures, its high acidity slowly eats away at the plasticizers in silicone caulk. Instead, for superficial mold spots, you want to hit up the pharmacy aisle for standard 70-80% isopropyl rubbing alcohol or standard 3.0% hydrogen peroxide. Dab it directly onto the black spots, let it sit to oxidize the fungus, and gently rinse it clear.
“Listen, most folks treat their silicone like concrete, blasting it with heavy bleach and stiff wire brushes. All you’re doing is shredding the waterproof barrier and giving mold a cozier place to live. Hydrogen peroxide is your true secret weapon.”
If those black roots have dug deep into the caulking, making it look like a blue cheese nightmare, you can’t clean it. It’s time to slice the old seal out with a utility knife and apply fresh caulk.
And Grime Permanently
You’ve done the hard work, now let’s protect your bathroom investment. The absolute best way to keep your shower pristine requires exactly ten seconds of effort after you turn off the hot water.
Pick up a cheap, reliable squeegee from Canadian Tire and rapidly swipe down your glass, tiles, and seals before you step out. Less standing water means absolutely zero limescale buildup and no damp environment for floating mold spores to party in.
Always crack a window or run your bathroom exhaust fan for at least 20 minutes post-shower. Lingering humidity is the enemy, and a bone-dry bathroom is your ultimate, impenetrable defense against future grime.
| The Solution | Best Used For |
|---|---|
| Neutral Soap | Yellowish soap scum & body oils on silicone seals. |
| 3% Hydrogen Peroxide | Superficial black mold spots on caulking. |
| Citric Acid / Vinegar | Limescale on glass & tile (KEEP OFF SILICONE). |
| Utility Knife | Deep, irreversible mold growth (time to replace). |
Frequently Asked Questions
Can I use bleach to whiten my shower caulking?
Absolutely not. Bleach is a master of disguise; it merely bleaches the surface mold transparent but doesn’t penetrate the porous silicone surface to kill the roots. Worse, the caustic nature of bleach rapidly deteriorates the silicone over time.
Why did my caulking turn yellow in the first place?
Yellowing is usually a nasty, layered buildup of hard water minerals, soap fats, and everyday body oils. A gentle pass with a soft brush and mild soap will strip that greasy yellow film right off, revealing the white caulk underneath.
How often should I realistically replace the silicone in my shower?
Even with perfect maintenance and daily squeegee habits, high-grade bathroom silicone usually maxes out around the 5 to 10-year mark. If it’s peeling away from the wall, flaking, or deeply infested with mold roots, cut it out immediately to prevent catastrophic water damage behind your tiles.
Wrapping It Up
🤝 Alright, it’s time to take action. Stop treating your expensive bathroom fixtures like a combat zone and start working smarter, not harder.
💡 By simply switching to neutral cleaners and relying on a trusty shower squeegee, you’ll extend the life of your plumbing joints by years.
📱 Share your thoughts with us if you’ve tried the hydrogen peroxide trick—it’s genuinely a game-changer for those stubborn dark spots.
👇 Good luck with the cleanup this weekend, and remember: keep it dry, keep it gentle, and enjoy your pristine shower!