
The Rise of Upcycled Concrete Decor
Industrial decor has dominated interior design for years, bringing the raw, textured look of concrete into living rooms and outdoor patios. However, purchasing pre-cast concrete planters and organizational trays from high-end boutiques often comes with a steep price tag.
You can bypass the retail markup by manufacturing your own concrete pieces at home. The secret to an eye-catching geometric mold is likely sitting in your refrigerator right now.
Standard egg cartons provide the perfect structure for casting cement. Their repeating dimples create a sturdy, multi-cell grid that works beautifully as a succulent planter, a tealight candle holder, or a rustic jewelry tray.
Gathering Your Materials
This project requires minimal investment and uses tools you likely already have in your garage. Stick to basic, fine-aggregate concrete for the best results.
- Fine concrete or craft cement: Avoid mixes with large gravel, as they will not settle into the small crevices of the mold.
- An egg carton: Plastic or styrofoam trays release moisture better, but classic cardboard cartons work well if prepared correctly.
- A release agent: Standard cooking oil spray or WD-40 prevents the cement from bonding permanently to the mold.
- Mixing supplies: A plastic bucket, a stir stick, and a dust mask for safety.
- Weights: Small stones or marbles to press into the cement if you are creating hollow compartments.
Preparing the Mold
Cement is heavy and inherently wet, which means it can easily warp untreated cardboard. If you are using a standard paper egg carton, coat the inside generously with an oil-based spray to create a waterproof barrier.
If you want to create a planter with actual hollow cups, you will need a second egg carton to act as the inner mold. Spray the underside of this second carton with your release agent as well.
For a purely decorative, solid geometric tray, you only need the bottom half of a single carton.
Mixing and Pouring the Cement
Put on your dust mask before working with dry cement powder. Follow the manufacturer’s instructions on your cement bag, adding water slowly until you achieve the consistency of thick pancake batter.
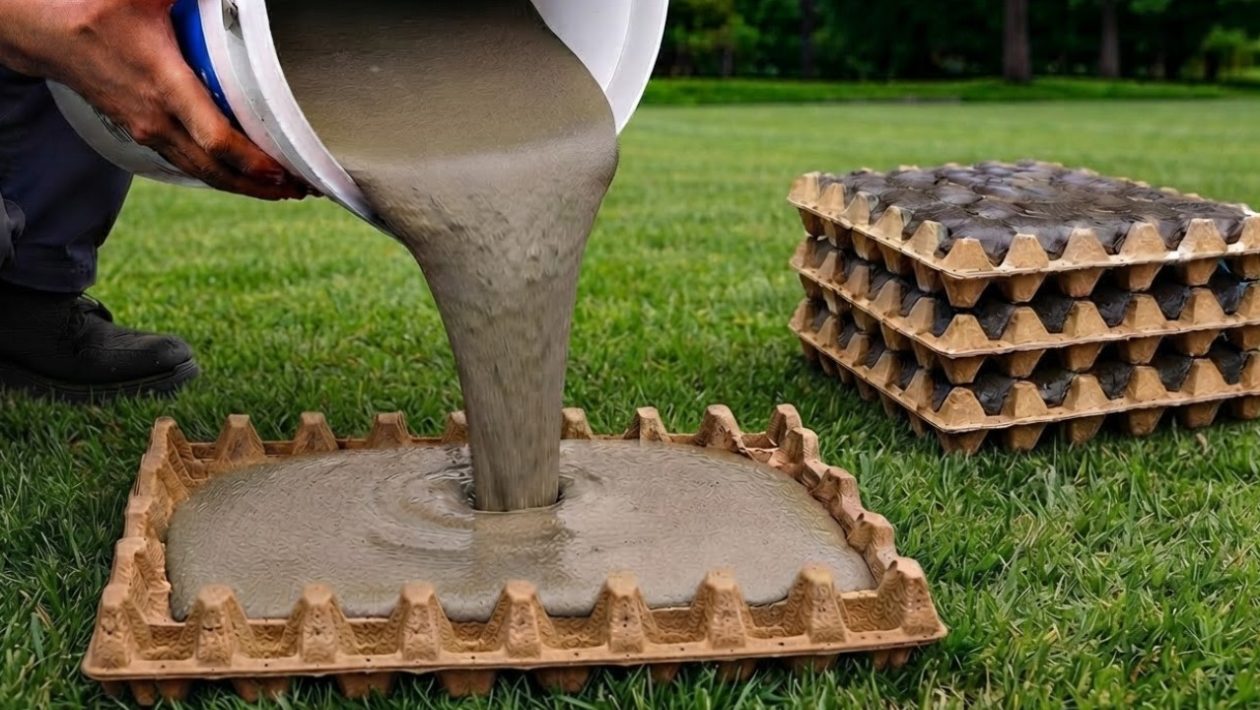
Pour the mixture carefully into the bottom half of your prepared egg carton. Do not fill it all the way to the brim, as the cement will displace and rise when you create the interior cavities.
Once poured, tap the carton firmly against your work surface for about a minute. This crucial step forces trapped air bubbles to rise to the surface, preventing weak spots and craters in your final piece.
Forming the Cavities
To hollow out the individual egg cups for planting or holding items, take your second oiled egg carton and press it directly down into the wet cement.
The cement will naturally push back up. To keep the top mold in place, fill its empty cups with heavy stones, marbles, or sand.
Ensure the top mold is seated evenly so your final concrete planter sits level on a table.
The Curing Process
Patience is the most important tool in concrete casting. While some rapid-set cements dry in hours, it is always safest to let your project cure undisturbed in a dry, room-temperature space for at least 24 to 48 hours.
Moving or flexing the mold before the chemical curing process is complete will result in hairline fractures.
Once the concrete feels rock-hard and cool to the touch, carefully remove the top weights and pull away the inner carton.
Demolding and Finishing Touches
Flip the bottom mold over and gently peel away the egg carton. If you used styrofoam or plastic, it should pop right off. If you used cardboard, you may need to tear it away in pieces.
Use medium-grit sandpaper to smooth out any sharp edges or uneven lips along the top of your new concrete tray. If you plan to use it outside or near water, brush on a coat of clear concrete sealer to protect the porous surface from moisture damage.
Drop a tealight into each compartment or pack them with specialized cactus soil and small succulents. Your recycled kitchen waste is now a heavy-duty, modern centerpiece.




