
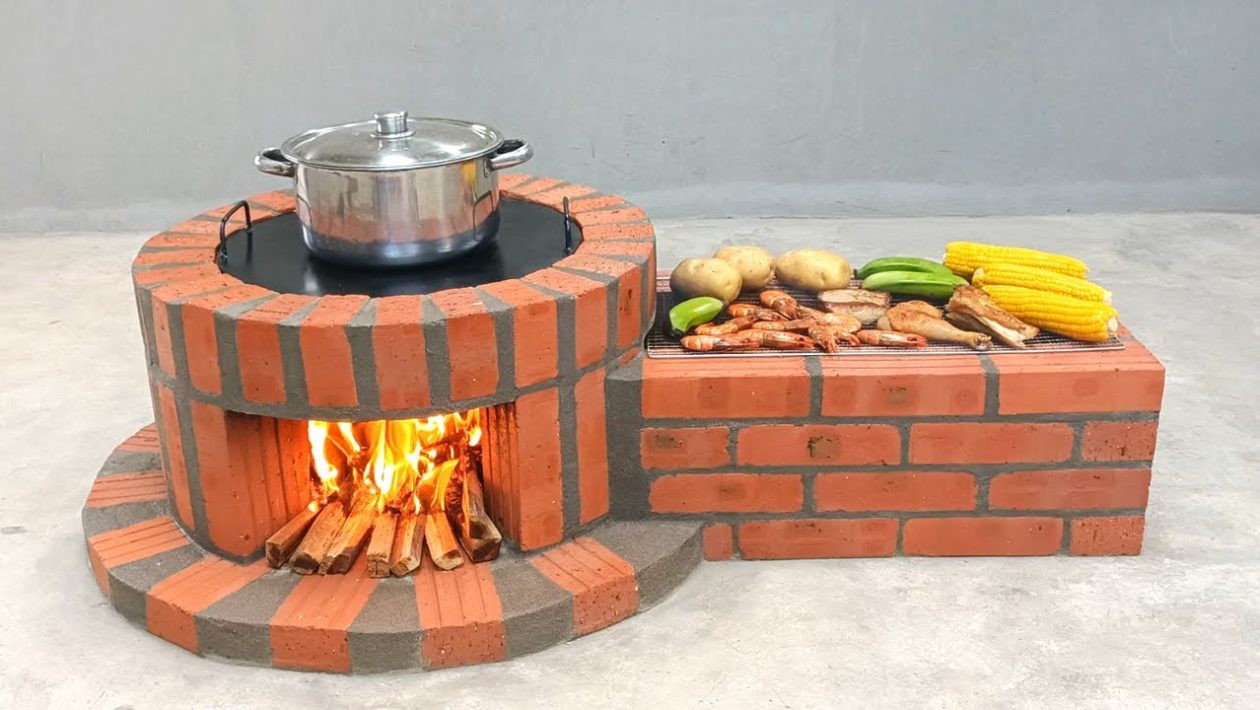
Outdoor cooking demands durability and high heat. While a traditional metal grill eventually rusts, a custom 2-in-1 wood stove built from red brick and cement can last for decades.
This design offers dual functionality in a single footprint. It typically features a primary cooktop for pots and skillets, alongside an open grill grate or secondary baking chamber.
Building one requires basic masonry skills, a clear plan, and the right materials to handle extreme temperatures.
Choosing the Right Materials
Red clay bricks are the standard for outdoor stoves. They handle rapid temperature changes without cracking, unlike standard cinder blocks.
For the bonding agent, standard Portland cement mixed with sand works well for the exterior structure. However, the inner firebox requires high-heat refractory cement.
Refractory cement withstands extreme wood-burning heat, preventing structural failure over time. You will also need a masonry trowel, a heavy-duty level, and custom steel grates.
Prepping the Foundation
A heavy brick structure needs an unyielding base. Any ground shifting will immediately crack your mortar joints.
Pour a concrete pad at least four inches thick, or level a flat base of solid concrete pavers. Ensure the surface is perfectly flat using a reliable level.
Let the concrete foundation cure completely before laying the first brick.
Laying the Brickwork
Start by dry-laying your first course of bricks without cement. This helps you visualize the footprint and ensures your cooking grates will fit perfectly.
Once the layout is confirmed, mix the cement. Apply an even layer of mortar and set the bricks, tapping them firmly into place with the handle of your trowel.
Stagger the vertical joints on each new layer. This running bond pattern locks the masonry together and adds immense structural strength.
Creating the 2-in-1 Design
Around the third course of bricks, leave an opening at the front for airflow and ash removal. Proper drafting is essential for maintaining a clean, hot fire.
Divide the upper structure into two distinct zones. Build a solid brick bridge or insert a thick steel lintel to separate the primary combustion chamber from the secondary cooking side.
Set steel support pins directly into the wet mortar. These will hold your cast iron cooking grates securely in place once the cement hardens.
Curing the Stove
Patience is the final requirement in any masonry project. Fresh cement holds trapped moisture that will turn to steam and crack the bricks if heated too quickly.
Allow the entire structure to cure for at least seven to ten days. Keep it covered with a tarp if heavy rain is in the forecast.
Light a small, low-heat break-in fire for the first run. This gently drives out residual moisture and tempers the brick for years of heavy use.




