
The Reality of Silicone Application
Applying silicone caulk looks deceptively simple on the surface. In reality, it is a notoriously messy and frustrating job for most homeowners.
A poorly applied bead of silicone not only looks terrible but often fails to create a proper waterproof seal. This leads to hidden water damage, structural rot, and stubborn mold growth inside walls.
Professional contractors do not rely on luck to get a flawless finish. They use specific, repeatable methods to control the silicone and force it exactly where it needs to go.
The Crucial Preparation Phase
Silicone will absolutely not adhere to dust, moisture, or old caulk residues. Skipping the preparation phase guarantees the new seal will peel away within months.
Scrape away all existing sealant using a sharp utility knife or a dedicated scraping tool. Take your time to avoid scratching the underlying tub or tile surface.
Once the bulk of the old material is gone, wipe the entire joint down with rubbing alcohol or denatured alcohol. This strips away microscopic grease and soap scum, leaving a pristine surface that must dry completely before you begin.
Cutting the Perfect Angle
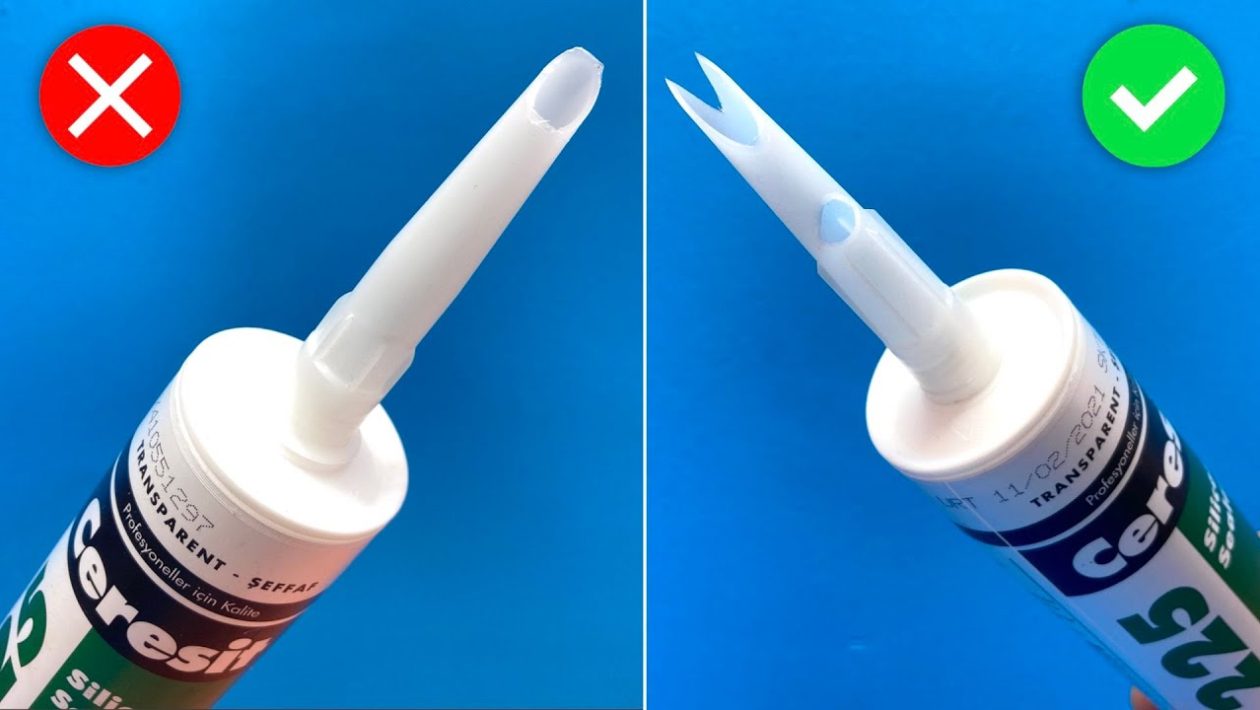
The way you prepare the silicone tube dictates the size and shape of the bead you lay down. Never slice the tip straight across.
Cut the plastic nozzle at a strict 45-degree angle using a utility knife. The size of the opening should exactly match the width of the gap you intend to fill.
If the tube features an inner foil seal, puncture it thoroughly with the metal rod attached to the caulking gun. A partially blocked nozzle will cause the gun to backfire and leak silicone out of the bottom.
Creating Razor-Sharp Edges
Professionals frequently use high-quality painter’s tape to guarantee perfectly straight lines. This is especially useful for wide gaps or uneven tile surfaces.
Apply a strip of tape along both sides of the joint, pressing the edges down firmly. Leave only the exact gap you want to seal exposed in the center.
This barrier prevents the sticky silicone from spreading over your surrounding surfaces. You must remove this tape immediately after smoothing the caulk, while the material is still completely wet.
Trigger Control and Speed
Load the prepared tube into a drip-less caulking gun. Push the release lever and plunge the metal rod tight against the base of the tube.
Hold the gun at a 45-degree angle, positioning it so the longest part of the cut nozzle faces up and trails behind the bead. Squeeze the trigger with steady, even pressure.
Move the gun toward you at a continuous speed. The goal is to lay down a consistent line without stopping, starting, or allowing the material to bunch up.
The Professional Smoothing Technique
Dry fingers will immediately drag, pull, and ruin wet silicone. The industry standard trick to avoid this involves a simple spray bottle filled with water and a few drops of dish soap.
Lightly mist the freshly applied bead of silicone and the surrounding area. Wet your index finger heavily in the same soapy solution.
Glide your finger lightly along the joint in one continuous motion. The soap prevents the silicone from sticking to your skin, allowing you to press the caulk deep into the gap while leaving a smooth, uniform surface behind.
Ditching the Finger Method
Many modern tradespeople prefer silicone profiling tools over their fingers. These small, rubber-edged squares or triangles come stamped with various angles and radii.
After laying the bead, you pull the profiling tool tightly along the joint. It cleanly scrapes away all excess caulk while forcing the remainder deeply into the seam.
This leaves a mathematically perfect concave or angled finish that a human finger simply cannot replicate. Keep a roll of heavy-duty paper towels nearby to constantly wipe the excess material off the tool.




