
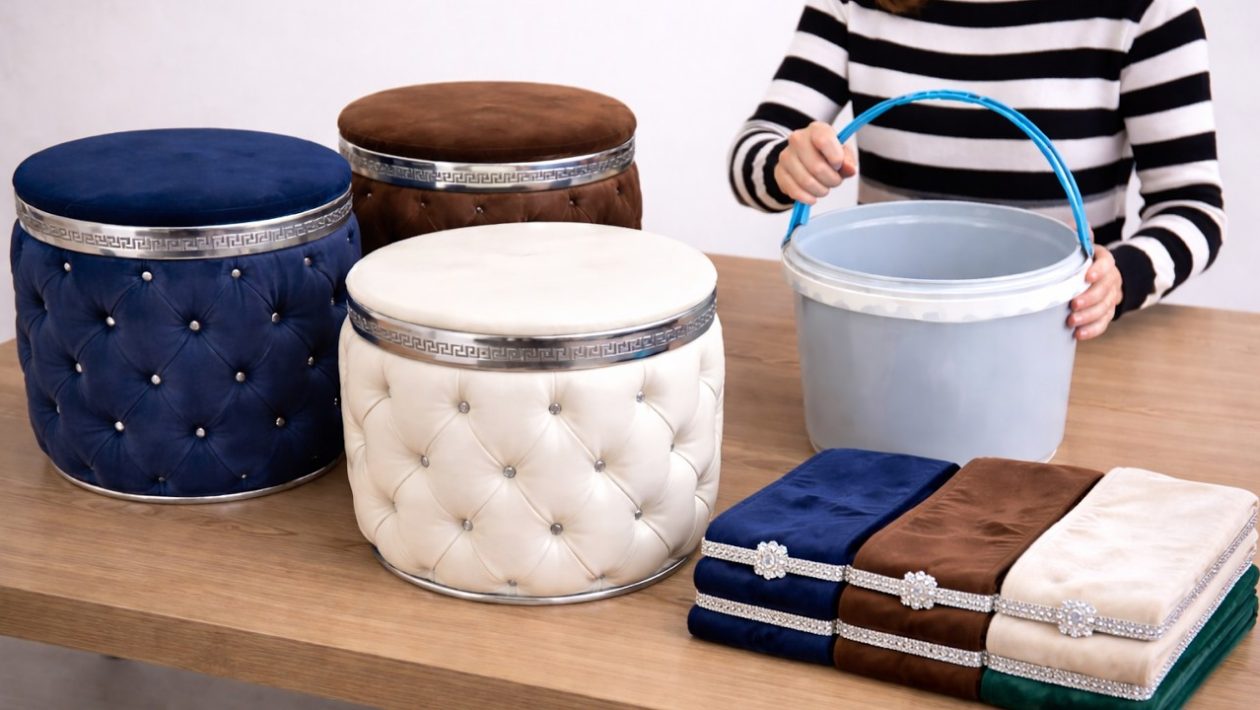
The Hidden Potential of Plastic Waste
Empty plastic buckets often end up in landfills or cluttering up the garage. Whether they originally held bulk paint, kitty litter, or restaurant supplies, these heavy-duty containers are built to endure heavy weight and rough handling.
Instead of throwing them away, you can upcycle these durable plastics into premium home decor. The secret to masking their industrial origins is velvet fabric.
Wrapping a cheap container in rich velvet instantly elevates it from trash to a chic storage bin or footstool. This is a straightforward, highly practical approach to DIY plastic buckets that requires minimal tools and no sewing.
Gathering Your Materials
You only need a few basic supplies to complete this transformation. Start with a clean plastic bucket of any size.
You will also need thin upholstery foam or quilt batting, a hot glue gun, heavy-duty spray adhesive, and half a yard of velvet fabric. Keep a sharp pair of fabric scissors and a piece of heavy cardboard nearby for finishing the base and lid.
Preparing the Base
Start by removing the metal or plastic carrying handle. You can usually pop these out with a flathead screwdriver or snip them off with heavy wire cutters.
Wash the interior and exterior of the bucket with warm, soapy water to remove grease, dust, or chemical residue. Dry the plastic completely. Adhesives will fail if applied to a dirty or slick surface.
Adding Structure and Softness
Most industrial buckets have raised plastic ridges for structural support. To hide these lines, wrap the exterior of the bucket in a single layer of thin quilt batting or upholstery foam.
Spray the exterior of the bucket with adhesive and press the batting firmly into place. Trim away any excess material at the top and bottom rims. This step prevents the final product from looking like a repurposed paint container and gives it a soft, high-end feel.
The Velvet Transformation
Measure and cut your velvet fabric, leaving a two-inch overhang at both the top and bottom of the bucket. Wrap the fabric tightly around the padded exterior.
Use a hot glue gun to secure the vertical seam. Fold the raw edge under before gluing to create a clean, tailored line.
Pull the excess fabric tightly over the bottom edge of the bucket. Glue it flat against the base, pulling it taut to avoid wrinkles on the sides.
Concealing the Edges
To hide the messy glued folds on the bottom, cut a circle of heavy cardboard slightly smaller than the base of the bucket. Cover this cardboard circle tightly with a scrap of velvet.
Glue this finished circle directly to the bottom of the bucket. This creates a professional, scratch-free base that is safe for hardwood floors.
Fold the remaining top overhang into the interior of the bucket and glue it flat against the inner plastic wall. You can line the inside with felt or a second cardboard insert if you plan to use it for open storage.
Upgrading the Lid
If your bucket came with a snap-on plastic lid, you can easily turn it into a padded seat. Cut a thick circle of upholstery foam to match the top of the lid and glue it down.
Stretch a piece of velvet tightly over the foam, pulling the edges down and securing them to the underside of the lid’s plastic lip with hot glue. Snap the finished lid back onto the bucket to complete your new velvet storage ottoman.




