
The Art of Coin Alchemy
Transforming a piece of currency into high-end jewelry requires more than just tools—it demands an understanding of metallurgy and precision carving. Using a vintage coin as the base material provides a unique history and a specific silver content that makes it ideal for shaping.
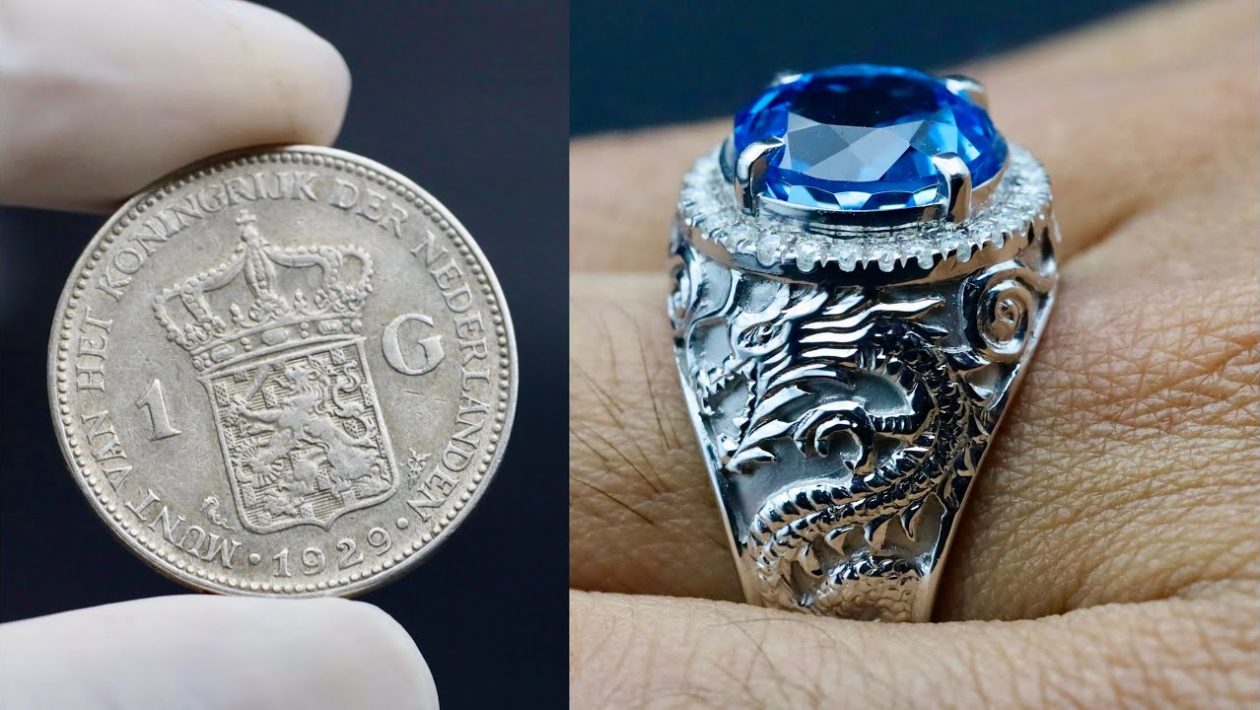
For this project, a 1929 Dutch East Indies coin serves as the foundation. With a 78% silver purity, the metal is malleable enough to be forged but robust enough to hold fine, intricate carvings. Unlike modern base-metal alloys, vintage silver offers a superior patina and luster once polished.
Material Selection and Preparation
Before any cutting begins, you must evaluate your material. While many vintage coins contain high silver content, they vary in thickness and size. A larger diameter is generally preferred for rings to allow for adequate wall thickness after the center is punched out.
Beyond the silver, selecting the right accent stones elevates the piece from a novelty item to a professional accessory. Swiss blue topaz is an excellent choice for a dragon-themed design, as its deep, oceanic hue complements the silver’s cool tone. Adding lab-grown diamonds as secondary ornaments provides the necessary contrast to make the dragon’s features pop.
Essential Techniques for Shaping
The process begins by annealing the coin—heating it to a dull glow and allowing it to cool. This relieves internal stresses in the metal, making it less prone to cracking during the shaping phase. Once softened, the center is punched out to create the ring’s diameter.
To achieve the ring shape, a ring stretcher or a series of graduated mandrels is used to expand the metal gradually. This must be done incrementally; forcing the metal too quickly will cause the silver to develop stress fractures. Always re-anneal the piece if you feel significant resistance.
Sculpting the Dragon
Once the band is formed, the artistry begins. Using a set of precision burrs and a micro-motor tool, you can begin carving the dragon’s scales directly into the surface of the ring. Focus on the flow of the design, ensuring the dragon’s body wraps naturally around the circumference of the finger.
- Layout: Sketch the dragon’s silhouette lightly on the silver with a scribe before carving.
- Depth: Use various carbide burr shapes to create high-relief texture for the scales.
- Setting: Drill precise seats for your blue topaz and diamond accents after the primary carving is complete.
Finishing for Professional Results
A raw, carved ring will appear dull. To bring out the depth of the dragon’s features, utilize an oxidizing solution—often referred to as “liver of sulfur”—to darken the recessed areas of the carving. This creates a high-contrast look that highlights the silver scales.
After oxidation, lightly buff the high points of the ring with fine-grit abrasive pads or a polishing wheel. The goal is to leave the dark oxide in the cracks and crevices while achieving a mirror-like finish on the raised surfaces. Finally, set your stones using a bezel or prong-setting technique to ensure they are secure for daily wear.
This process, showcased in the accompanying video, demonstrates how patience and the right choice of raw materials can turn a historical relic into a functional work of art. Always work in a well-ventilated space and wear appropriate safety gear when handling heating elements or high-speed rotary tools.




