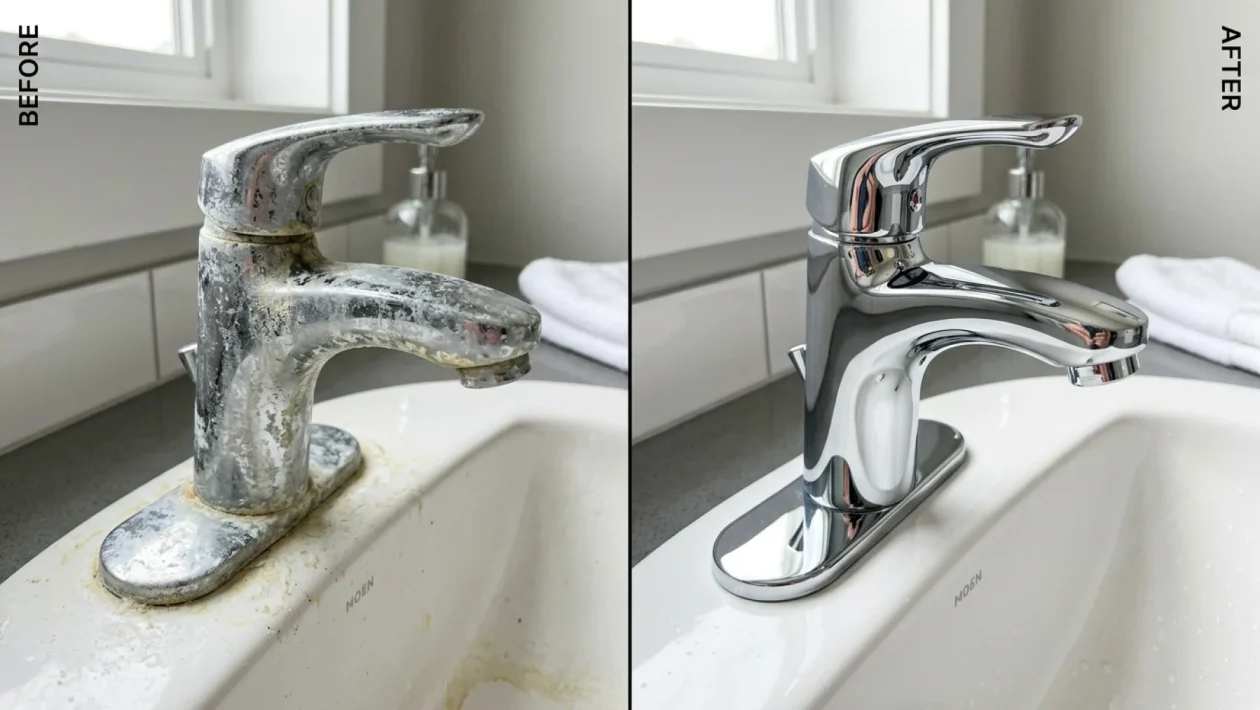
You are staring at that crusty, chalky ring around your toilet bowl and the white buildup choking your showerhead, ready to deploy the heavy chemical artillery. Put down the toxic bleach right now. That stubborn, rock-hard crust is calcium carbonate, and you can literally melt it away using two dirt-cheap items sitting in your kitchen pantry.
If you are dealing with endless mineral buildup, you aren’t alone in this fight. The truth is, nearly 85% of North American homes have hard water running through their municipal pipes. That means every single time you flush a toilet or run a shower, microscopic minerals are layering themselves onto your porcelain and chrome.
Bathroom Limescale Removal: Why Your Fixtures Look Terrible
Limescale is the ugly byproduct of everyday life, and it absolutely loves to cling to the wettest areas of your home. It starts as a dull, harmless film on your faucet and eventually hardens into a scaly, yellowish concrete.
Scrubbing it dry will only ruin your weekend and permanently scratch your expensive fixtures. The secret to victory isn’t elbow grease; it is basic chemistry. You need a mild acid to break down the alkaline minerals, followed by a gentle abrasive to lift the gunk away.
Before you jump in the truck, drive down to Canadian Tire, and drop thirty bucks on harsh industrial cleaners, you need to raid your kitchen instead.
Eradicate Hard Water Stains: The Science Behind The Fizz
We are going old-school with standard household white vinegar and baking soda. The acetic acid in vinegar literally eats through the calcium deposits, while baking soda acts as a gentle, deodorizing scouring powder.
When combined directly on the stain after a proper soak, the chemical reaction forcefully lifts the dissolved grime from the surface. Plus, vinegar is a natural antibacterial agent that obliterates the nasty bacteria causing your bathroom to smell funky.
| Commercial Chemical Cleaners | Pantry Solution (Vinegar & Baking Soda) |
|---|---|
| Expensive ($10-$15 per bottle) | Literally pennies per application |
| Harsh fumes and toxic skin irritants | 100% natural and completely safe to breathe |
| Can permanently etch delicate chrome | Gentle on standard fixtures when used correctly |
With A 2-Ingredient Pantry Solution: Action Plan For Toilets And Faucets
The trick isn’t just dumping these ingredients into a bowl together; it is all about the staging. You need to let the acid do the heavy lifting before introducing the abrasive element.
“Homeowners rush the process and mix the vinegar and baking soda immediately, which just leaves them with useless fizzy water. You have to let the vinegar sit and penetrate the limescale for at least fifteen minutes before adding the baking soda.” – Mike Holmes, Professional Canadian Contractor
Here is your foolproof, step-by-step game plan for tackling both the gross toilet bowl and your sensitive chrome faucets.
- Prep the Toilet: Turn off the water valve behind the tank and flush to empty the bowl. Pour a generous amount of hot (but not boiling) Heinz white vinegar right over those stubborn water rings.
- Let It Soak: Walk away for 15 to 30 minutes. Let the acid soften that hard carbonated shell so you do not have to break a sweat later.
- Add the Fizz: Sprinkle a thick layer of Arm & Hammer baking soda directly onto the vinegar-soaked stains. Let the fizzing action work into the porous grime for another 10 minutes.
- Scrub and Flush: Grab a stiff-bristled toilet brush, scrub the loosened debris away, turn the water back on, and give it a final flush.
- Wrap Your Faucets: For showerheads and bathroom taps, soak a microfiber cloth or paper towel in warm white vinegar. Wrap it tightly around the crusted area and leave it to soak for 15 minutes.
- Polish to a Shine: Remove the cloth, sprinkle a little baking soda on a damp, soft sponge, and wipe the fixture gently to avoid scratching the delicate metallic finish. Rinse with cold water.
Frequently Asked Questions
Can I use apple cider vinegar instead of white vinegar?
You can, but I highly advise against it. Apple cider vinegar leaves a sticky, sugary residue behind and could easily stain lighter, porous bathroom surfaces. Stick to the cheapest, clear white vinegar you can find for cleaning.
Is it safe to use this mix on natural stone showers?
Absolutely not. Acidic solutions like vinegar will permanently etch and ruin natural stone like marble, travertine, or granite. Reserve this powerful pantry trick exclusively for porcelain, ceramic, glass, and standard chrome fixtures.
How often should I do this limescale treatment?
For standard bathroom maintenance, hit your high-traffic water zones once every two to three weeks. Staying ahead of the microscopic buildup means you will never have to do intense, hour-long scrubbing sessions again.
🤝 You now have the ultimate blueprint to reclaim your bathroom from the clutches of hard water. No more gagging on bleach fumes or wasting your hard-earned money on specialty products that promise the world but deliver nothing.
💡 Remember the golden rule: patience is your best and most effective tool. Let that hot vinegar sit and do the heavy lifting before you even think about picking up a scrub brush.
📱 Share your thoughts or drop a comment below if you have tried this exact method on a nightmare bathroom. I love hearing your DIY success stories from the trenches.
👇 Good luck, get cleaning, and enjoy that brand-new, mirror-like shine on your bathroom fixtures!