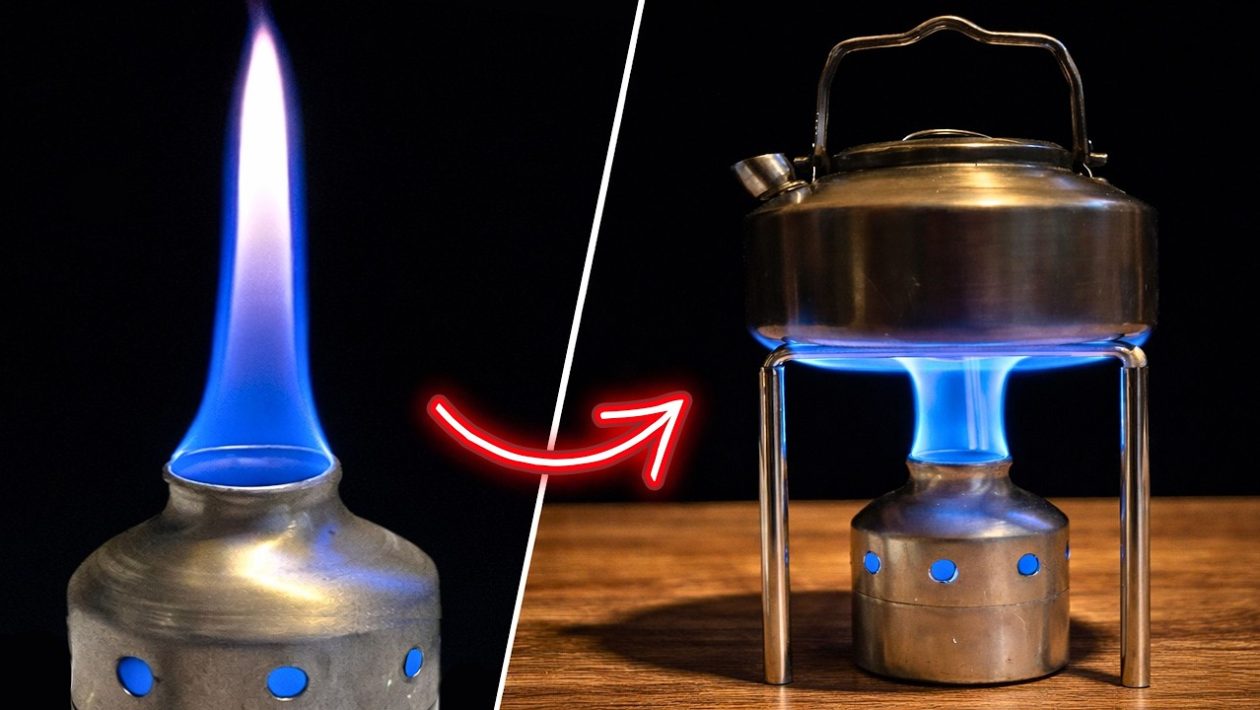
The Case for the DIY Alcohol Stove
In the world of ultralight backpacking and emergency preparedness, weight and simplicity are everything. A commercial camp stove can cost upwards of $100 and relies on proprietary fuel canisters that are heavy and hard to recycle. A rocket-style alcohol stove, however, turns common household trash into a highly efficient piece of survival equipment.
This design utilizes the thermodynamics of pressurized vapor to produce a focused, powerful flame. By converting denatured alcohol—a clean-burning, widely available fuel—into gas, you can boil water or cook a meal in conditions where carrying heavy gear simply isn’t an option.
Essential Gear for the Build
You don’t need a machine shop to assemble this stove. Most of the materials are likely already in your recycling bin. To get started, you will need:
- Two aluminum beverage or water bottles (ensure they are aluminum, not tin or steel).
- A precision knife or heavy-duty scissors.
- A permanent marker and a ruler for clean cuts.
- A small nail or punch for creating the burner jets.
- High-heat epoxy or specialized tape (optional, depending on the fit).
The Fabrication Process
The efficiency of a rocket alcohol stove comes down to the seal and the precision of the burner holes. Start by measuring your aluminum cans to create two distinct sections: the base and the burner top. Use a sharp utility knife to score the aluminum—avoid pushing too hard, as you want a clean, burr-free edge.
Once you have your two halves, the next step is defining the flame pattern. Space your holes evenly around the rim of the top section. Using a small nail, punch holes at an angle rather than straight up and down. This creates a “swirl” effect in the flame, which increases the intensity of the heat and improves fuel-to-air mixing.
Precision Assembly
The two halves of the can must fit snugly together. Because aluminum is malleable, you may need to crimp the edge of one piece slightly to slide it into the other. Aim for an airtight seal where the two pieces meet; if air leaks from the sides, your flame will be erratic and inefficient.
Many builders choose to add a layer of fiberglass insulation or a thin metal mesh inside the chamber. This acts as a wick, helping the alcohol vaporize more consistently as the stove reaches its operating temperature.
Operational Safety and Best Practices
Alcohol stoves do not have an “off” switch. Once the fuel is lit, it will burn until the reservoir is empty. Never attempt to refuel a stove that is currently hot or burning; this is the leading cause of accidental fires in the backcountry.
Always use a stable, non-flammable base for your stove. Because these units are lightweight, they can easily tip over if placed on uneven ground. A simple DIY windscreen made from a folded piece of aluminum foil is highly recommended to block crosswinds, which will significantly reduce your boil time.
Fueling Your Stove
For best results, use denatured alcohol or high-percentage isopropyl alcohol. Denatured alcohol is preferred because it burns cleaner and produces less soot on the bottom of your cookware. When filling, use a small measuring cup to avoid spills. A little goes a long way—typically, two ounces of fuel is sufficient to boil 16 to 24 ounces of water, depending on ambient temperatures and wind exposure.
By mastering this build, you gain more than just a stove; you gain the ability to create essential gear from the discarded materials around you. It is a fundamental skill for anyone looking to bridge the gap between “purchased gear” and “true self-reliance.”