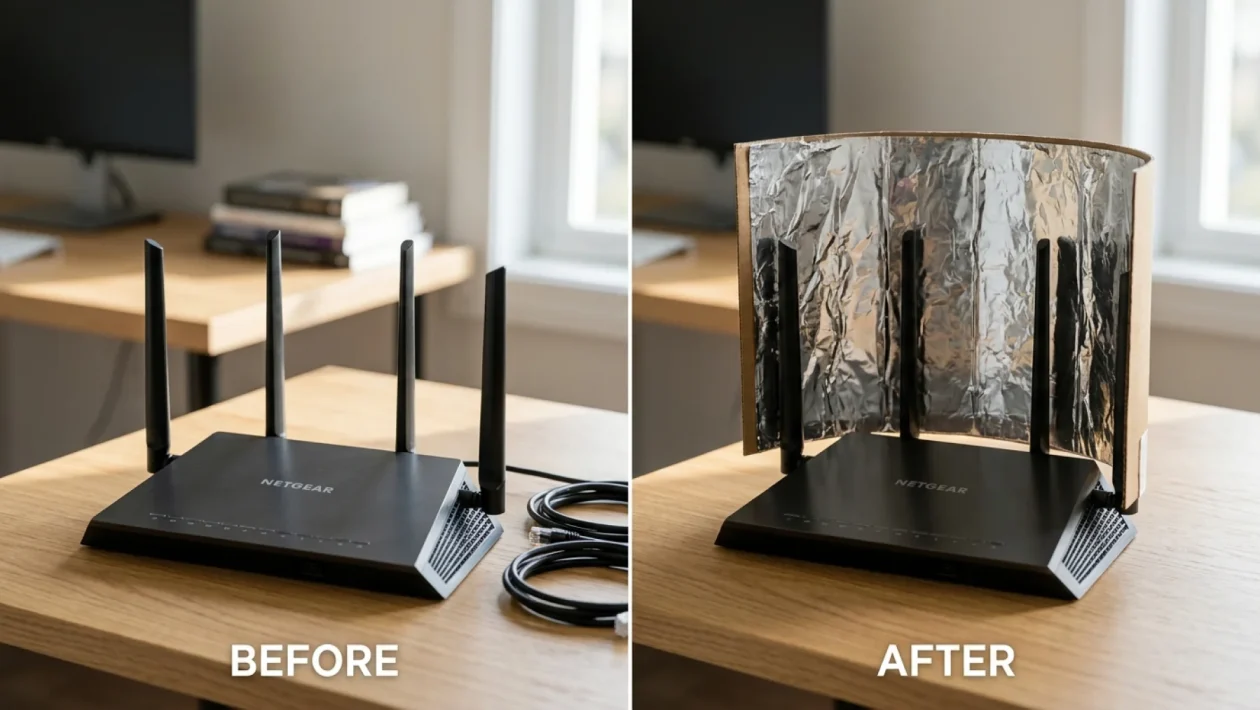
You are paying top dollar for premium internet, yet the moment you walk into the basement or the spare bedroom, your connection flatlines. It is incredibly frustrating to watch a loading screen spin when you should be streaming the playoffs. You do not need to call your service provider to complain, and you definitely do not need to buy a $300 mesh networking kit. The ultimate solution to direct your coverage exactly where you want it is sitting in your kitchen drawer right now.
Wi-Fi Signal Reborn
Understanding how your home network operates is the first step to taking control of it. Most standard routers provided by major Canadian telecoms like Rogers or Bell use omnidirectional antennas. This means they blast your precious bandwidth out in a massive 360-degree circle.
If your router sits against an exterior wall, half of your connection is literally being beamed out into your backyard or your neighbor’s driveway. You are wasting the signal you pay for.
Here is a staggering fact: Researchers at Dartmouth College found that utilizing a simple metallic reflector can boost targeted Wi-Fi signal strength by over 50%. By placing a physical barrier behind the antennas, you stop the signal from traveling where it isn’t needed.
How Aluminum Foil Fixes Dead Zones
Aluminum foil acts as a mirror for radio waves. When you curve it around the back of your router’s antennas, it catches the signals traveling the wrong way and bounces them back into your living space.
Creating this directional shield is a fast, foolproof weekend project. Here is exactly how you build one this spring of 2026 to eliminate those frustrating dead spots:
- Rip a standard sheet of aluminum foil, roughly the size of a piece of printer paper.
- Find an empty cereal box or some sturdy cardboard to use as a backing frame.
- Wrap the foil tightly around the cardboard, ensuring the shiny side is facing outward.
- Gently bend the foil-covered cardboard into a “U” or “C” shape (like a radar dish).
- Place it directly behind your router, with the open curve facing the rooms where you need the most coverage.
Instantly, the dead zone in your upstairs office will see a massive improvement. The foil effectively “funnels” the wireless energy straight through your home.
And Speeds Up Your Internet
By concentrating the waves, you are not just extending the reach; you are increasing the actual density of the connection. A denser connection means less packet loss, lower latency, and faster download speeds.
“Wireless antennas are notoriously inefficient when placed near exterior walls. A basic metallic reflector essentially acts like a spotlight housing, taking a scattered lightbulb effect and turning it into a focused beam of high-speed data,” explains senior network engineer Dave Harrison.
When you compare this simple kitchen fix to buying expensive tech hardware, the choice becomes painfully obvious.
| Networking Solution | Estimated Cost & Setup |
|---|---|
| DIY Aluminum Foil Reflector | Under $1 / 5 Minutes |
| Premium Mesh Network System | $250 – $500 / 1-2 Hours |
Before you open your wallet to upgrade your plan or buy more hardware, give this kitchen-drawer method a try. It is a zero-risk project that takes less time to build than brewing a cup of coffee.
Frequently Asked Questions
Does it matter if I use the shiny side or the dull side of the foil?
Scientifically, the difference is negligible for radio waves. However, keeping the shiny side facing the router is recommended as it generally provides a slightly smoother, more uniform reflective surface for the signal to bounce off.
Will putting foil near my router cause it to overheat?
Not at all, as long as you do not wrap the router itself! The foil reflector should stand a few inches behind the antennas. Never cover the ventilation holes on the actual router box.
Does this work on both 2.4GHz and 5GHz bands?
Absolutely. Aluminum reflects both frequencies effectively. You will likely notice the biggest speed difference on the 5GHz band, which typically struggles to penetrate through multiple walls without a targeted boost.
Final Thoughts On Supercharging Your Home Network
🤝 Good luck with your new, supercharged home setup! You now have the exact blueprint to stop wasting your bandwidth and start beaming it right where it belongs.
💡 The best part about this DIY project is that it proves you don’t always need to throw money at a tech problem to find a highly effective solution.
📱 If you try this out and finally get a full connection in your basement or garage, share your thoughts and speed test results with us.
👇 Drop a comment below if you have any other genius home networking strategies you swear by!